Please ensure Javascript is enabled for purposes of website accessibility

News

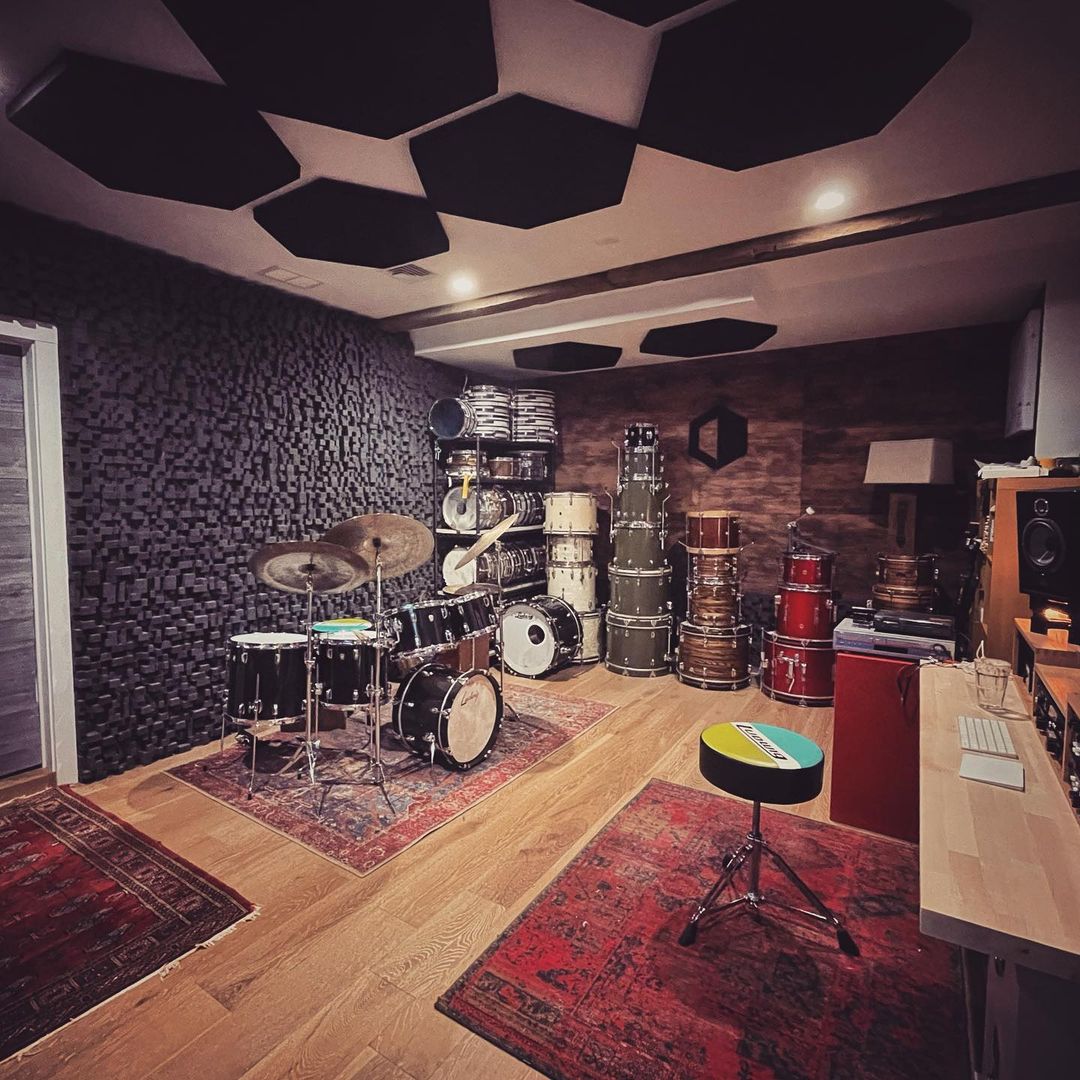
Customer Showcase: Carter McLean's Drum Studio

Carter McLean Photo
Carter McLean Photo

Carter is the drummer for the Lion King on Broadway. He had been using Audimute Sound Absorption Sheets in his home studio for years with great success. The Sound Absorption Sheets met his needs as they effectively improved the sound in his studio, were affordable, and worked well as a background for video production.

When the opportunity arose to transform his garage into a new studio, Carter called Audimute to expand on his success with Sound Absorption Sheets and create a unique sound solution. We worked together to design, manufacture, and install Audimute solutions culminating in a one-of-a-kind studio that looks and sounds amazing.

“It is so quiet in here … I can just hear the instrument.” - Carter McLean

Check out Carter's Customer Showcase Page to learn more about Carter as well as the process and sound management solutions used to help build his dream studio.

Audimute vs. Cringe-Worthy Moments in Television

Soundproofing Solutions in Television

You know those cringe-worthy conflicts you watch unfold in film and on television due to poor noise control? What about those sounds you wish you never heard? Well at Audimute, we cringe harder. Why? Because we know these conflicts could have been prevented with a simple Audimute solution.


Cringe with us as we walk you through our easy fixes to these problems:

1. "Christmas Vacation"

Many consider the Griswold family to be the worst neighbors in television history. Despite our love for their quirkiness, we agree. Sorry, Griswolds, but displaying thousands of high-powered Christmas lights and chain-sawing your neighbor’s trees in the middle of the night doesn’t make for a pleasant living environment. This infamous behavior leads the holiday-obsessed family to acquire some enemies in close proximity. Had the neighbors implemented sound-blocking Peacemaker, the unwanted sounds of the Griswold’s bizarre lifestyle would remain where they belong: out of hearing reach. With Peacemaker obstructing the noises of the Griswold’s obnoxious tendencies, a hostile neighbor relationship could have been avoided. And maybe even a squirrel attack.


2. "Dumb and Dumber"

The “most annoying sound in the world” broadcast by Lloyd is still ringing in our ears. The echo of his screech bounced around their van with enough reverberation to make us all want to plug our ears. Had their furry vehicle been lined with our acoustic art panels, the sound of Lloyd screaming would have been tolerable. Acoustic panels eliminate high-frequency sound, preventing reflection and decreasing reverberation, regardless of how annoying that sound may be.


3. "School of Rock"

Jack Black’s character, the washed-up musician and phony substitute teacher Dewey Finn, selfishly recruits students as members of his band. To do so, he claimed band rehearsal was a school project that they were getting an illegitimate head-start on, hence the extreme covertness of the operation. The class has a few close encounters with the principal, Ms. Mullins, revealing the need for a soundproofing solution like Isolé. With Isolé hanging on the door and walls of the make-shift rehearsal space, the “School of Rock” could practice in peace without being overheard in the hallways of the school.


Take it from us, when it comes to comfort, sound plays a large role. Spare yourself the cringing and explore our acoustic art panels and other soundproofing solutions.

LEED Certification: What is it and How Audimute can Help?

LEED, or Leadership in Energy & Environmental Design, is transforming the way we think about how our buildings and communities are designed, constructed, maintained and operated across the globe. LEED is a comprehensive and flexible tool used to analyze a project’s sustainable qualities and rate them on a scale.


In order to obtain your LEED certificate, you have to satisfy a certain number of prerequisites to earn points. The number of points a project earns will determine the level of LEED certification.


Sometimes knowing what products to choose to help you obtain your LEED certification can be a difficult decision to make. Here are three ways in which Audimute products can help you gain points towards your LEED certification.


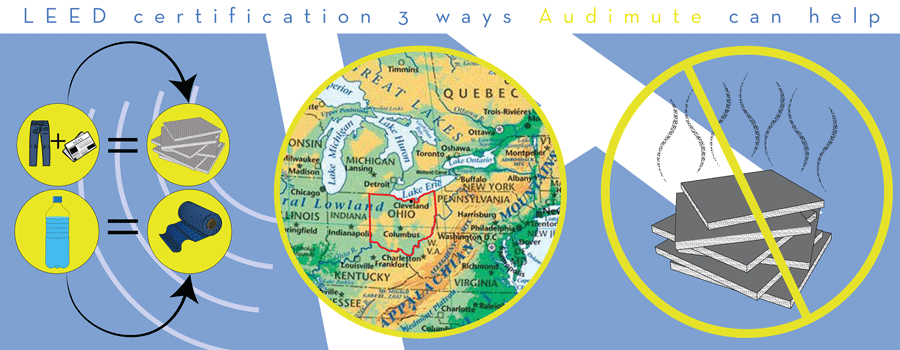
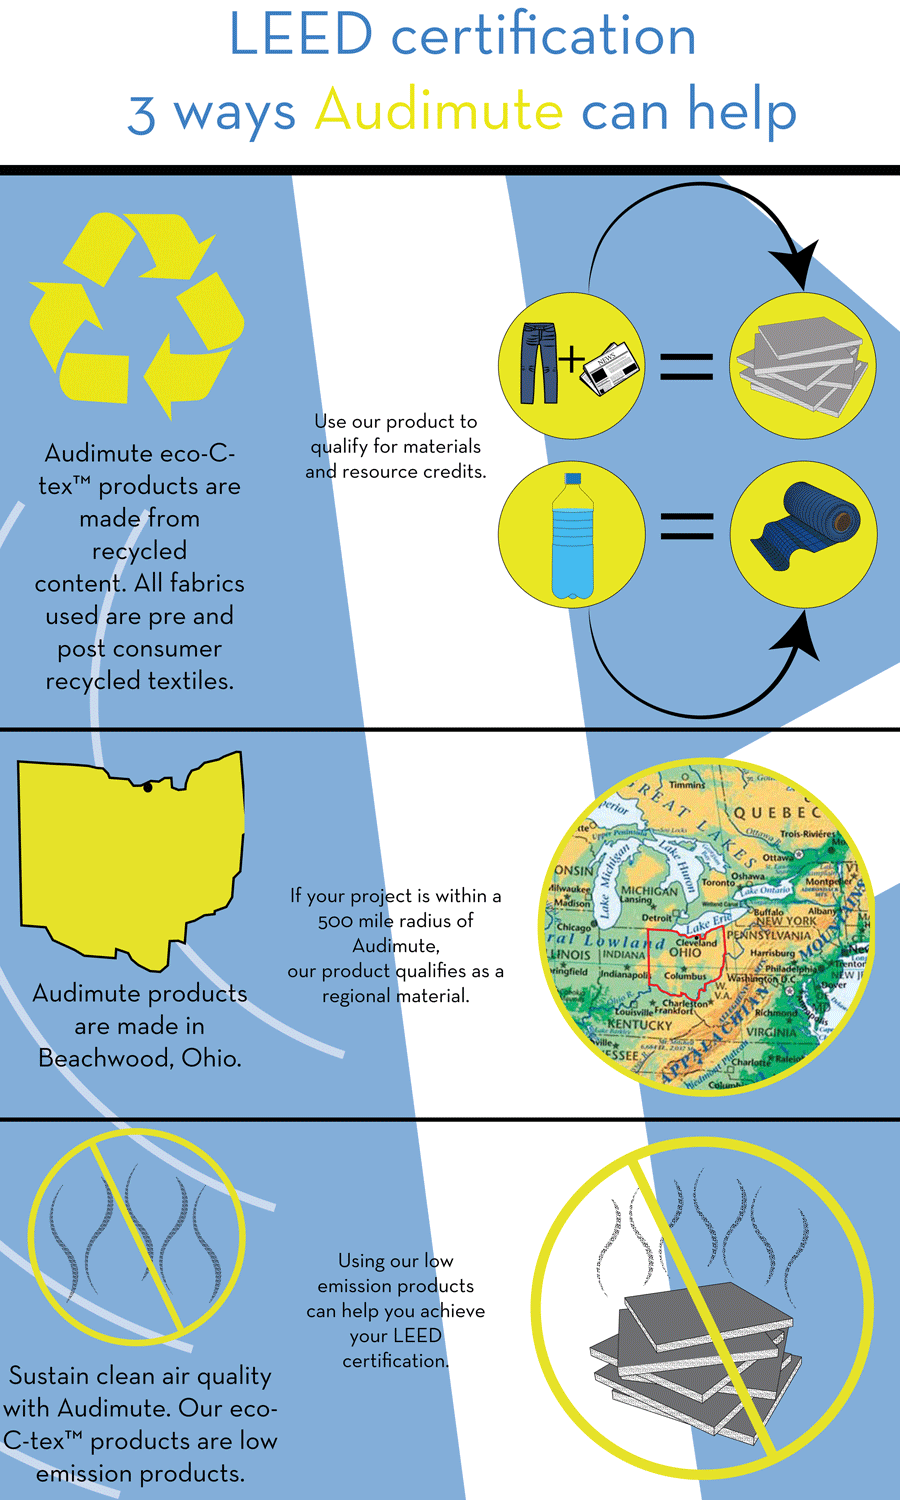
Materials and Resource Credits- Audimute eco-C-tex™ products are made from recycled content. All fabrics used on our products are pre and post consumer recycled textiles. Also, our Peacemaker™ product is made from recycled tires.


Regional Material- Audimute products are made in Beachwood, Ohio. So, if your project is located within a 500 mile radius of Audimute, you can gain 1 point towards your LEED certification.


Low Emitting Materials – Audimute products contain little to no adhesives and do not give off V.O.C.’s (Volatile Organic Compound).

So if your project requires acoustic treatment, check out all of Audimute's products (here) for the best sound and environmental results.

Audimute and LEED Points


Audimute Call to Action

10 Easy Home Soundproofing Tips

10 Easy Home Soundproofing Tips


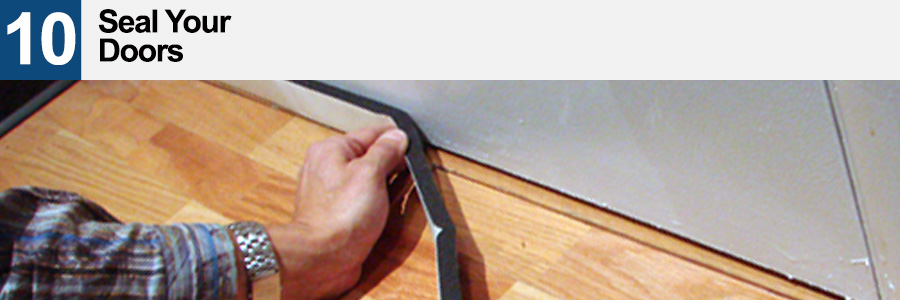
10. Seal Those Doors

A common issue we come across is sound from another room traveling right through the door. If having a paper thin door isn’t your issue, the problem may be the space around the door that sound is escaping through. Products like Audimute’s Door Seal Kit is extremely affordable and a simple fix to this issue. Within minutes you can stop sound from traveling through the spaces around your door.

9. Don't Slam the Cupboards

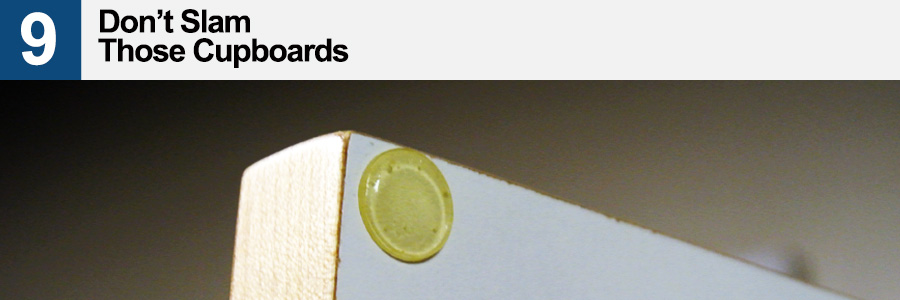
This may sound obvious, but it is a common complaint we hear all the time. Over the years the bumpers on your cabinet doors start to wear. This is a $5 fix that only takes a few minutes of your time. Cabinet door bumpers can be purchased at most hardware stores. Simply peel and stick on the inside corners of your cabinet door and you won’t hear that loud wood on wood clatter that makes you cringe.

8. My Pets are Going Crazy!

I could probably write another 10 tips on pet sound proofing, but here is the bottom line: your animals have sensitive ears. So intense sound bothers them even more than it does you. The echoing and intensity fires them up resulting in more and more chatter. Focus on adding sound absorbent materials to the rooms in which your pets spend the most time. This could be anything from a rug on hard floors to Acoustic Panels on the walls. You could even try a blanket or Acoustic Sheet over their cage. Some animals respond well to background noise, which helps to break up sound intensity. Personally, my dog likes listening to The Beagles…

7. My workout space is too Loud

So besides turning down the radio, here is what you can do to help control the sound. The key here is the floor: you need to absorb that vibration. Whether you’re running on a treadmill or just slamming down those dumbbells, an isolation product is the perfect solution. You can find gym floor tiles at your local sporting good store. These will help, but for better results check out Audimute’s 6.4mm Peacemaker. It is less expensive and will give you the best results of any gym flooring product on the market.

6. My Windows Rattle

Tired of your windows rattling every time a truck goes by? This is an easy fix. I suggest using one of Audimute’s Door Seal Kits placed between the window frame and outer casing. If there isn’t enough room you can always go to the hardware store and find some rope with the correct diameter to use instead. As a bonus this will Stop sounds from creeping through the cracks of your windows, making your indoor environment quieter overall.

5. I hear footsteps

If you live in a home or apartment covered in hard surfaces you may be plagued with the sounds of footsteps. This is an easy and inexpensive fix. Try installing rugs in high traffic areas. They will soften impact noise as well as aid in sound absorption.

4. My Spouse Snores

Sleep posture plays a large role in snoring. Sleeping flat on your back causes the flesh of your throat to relax and block the airway. Try taping tennis balls to the back of your spouse's pajamas to keep them from sleeping on their back. If this doesn't work at least you get the enjoyment of seeing your spouse with tennis balls taped to their back. If you're wondering, there was no way I could get my wife to do this, so if you figure out how to do that please let me know.

3. Loud Sub Pump

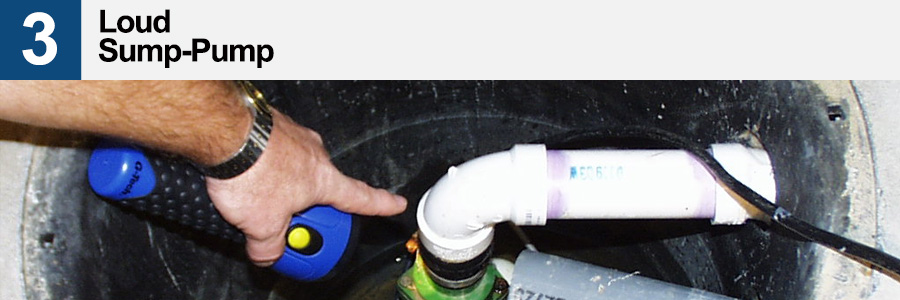
This is an issue I just recently dealt with myself. Living in a low flood area, my sub pump seemed to push water every 30 minutes. So what should you do? Check the pipe coming from the sub pump. Does it vibrate against your wall? If so try placing an absorptive material or even some old rags between the pipe and the wall. I suggest Audimute’s Peacemaker to stop vibration. If this isn’t the issue try putting up what I like to call the “Cone of Silence”: 6.4mm Peacemaker rolled into a cone shape placed over the pump and around the pipe.

2. Is it Humane to Soundproof a Baby

Answer is an obvious no. What you can do however is make the sounds they hear more pleasurable. Reduce the intensity of sound by adding rugs to hard flooring and focus on using soft materials, including furniture, bedding, and draperies when planning your nursery. If you’re looking for a design friendly solution consider Audimute’s Custom Image Acoustic Panels. Maybe spell out your baby's name in 1’x1’ Acoustic panels that match your nursery décor?

1. Silence Your Washer and Dryer

You may not actually be able to silence your washer and dryer, but what you can do is lower the intensity of sound they omit. If you place your hand on your washer and dryer while they are running, what do you notice? Vibration! This is the first thing to address. More than likely they are sitting on a hard surface such as cement, tile or even hardwood flooring. Placing something underneath them to reduce the vibration will help tremendously. Audimute’s 6.4mm Peacemaker is great for reducing vibration and taking the edge off the sound. A less effective solution may be adding a rug or carpet- the thicker the better. This works for dishwashers as well! You can also hang blankets or Acoustic Sheets over door ways to your laundry room to aid in sound absorption.

How Dematerialization Sabotages Your Acoustic Environment

How Dematerialization Sabotages Your Acoustic Environment

Last week we discussed how modern design trends can negatively influence your acoustic environment. These trends included dematerialization, green building and exposed systems. Over the next few posts we will examine each trend and how it affects your work space. We will also explain how we were successfully able to implement each trend without compromising our acoustic environment. This week we will focus on: dematerialization and how it can negatively impact the sound in your space.

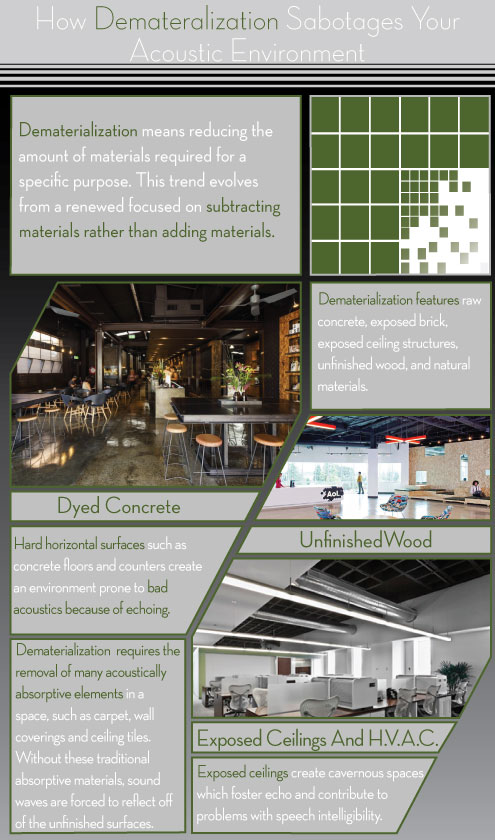
Dematerialization means reducing the amount of materials used to create a space while still allowing it to fulfill its designated purpose. This trend is the result of today’s technological era in which we focus on subtracting materials from things to improve their capacity and performance. Dematerialization features elements such as: raw concrete, original brick, exposed ceiling structures and unvarnished wood.

Dematerialization adds modern character to a space but it can be detrimental to acoustic quality. Dematerialization requires the removal of many acoustically absorptive elements in a space, such as carpet, wall coverings and ceiling tiles. Without these traditional absorptive materials, sound waves are forced to reflect off of the unfinished surfaces. The reflection of sound waves against hard surfaces will create an intense pressure forcing sound to amplify in volume.

How Dematerialization Sabotages Your Acoustic Environment

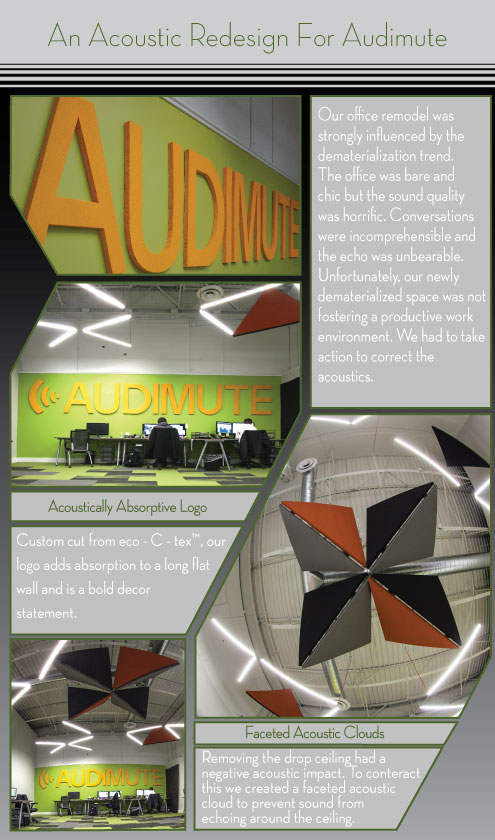
Our office remodel involved many elements that were inspired by the dematerialization trend. During our renovation we stripped down our walls, took out our carpeting and removed our drop ceiling. Our office looked bare yet chic but the sound quality was horrific. Conversations across the room were incomprehensible and the echo was unbearable. Unfortunately, our newly dematerialized space was not fostering a productive work environment.

So, we had to make a change that would not compromise the integrity of our design but would allow our co-workers to concentrate. We covered our unfinished floors with a bold carpet design. Then, we installed a finished drywall and painted one feature wall an electric green color that features our logo. The logo was custom cut from our trademarked eco-C-tex product and is a bold décor statement that is acoustically effective. Finally, we approximated the acoustical benefits of a drop ceiling by installing faceted acoustical clouds which lowered the ceiling height and helped to absorb the unwanted echo.

How Dematerialization Sabotages Your Acoustic Environment

Based on our experience, we recommend selecting one aspect of this trend and featuring that in your space. This will keep your design sleek and modern without sacrificing the sound quality in your space. Come back next week for our discussion of environmentally conscious building trends and how they can influence the sound in your room.

Pinterest- Dematerialization

How Exposed Architectural Systems Can Sabotage Your Acoustic Environment

Exposed-Architectural-Systems-and-Acoustics-1-Banner

Over the past few weeks we have evaluated how modern design trends, like Dematerialization, Green Buildings and Exposed Systems, can effect your acoustic environment. This week we will conclude our Modern Design Series by looking into the acoustical effects that exposed architectural systems may have on your work environment. We will tell you how to use your HVAC system to create an optimal work place for your employees, and how to acoustically treat exposed ceiling beam and trusses.

HVAC Systems Are No Longer Hidden

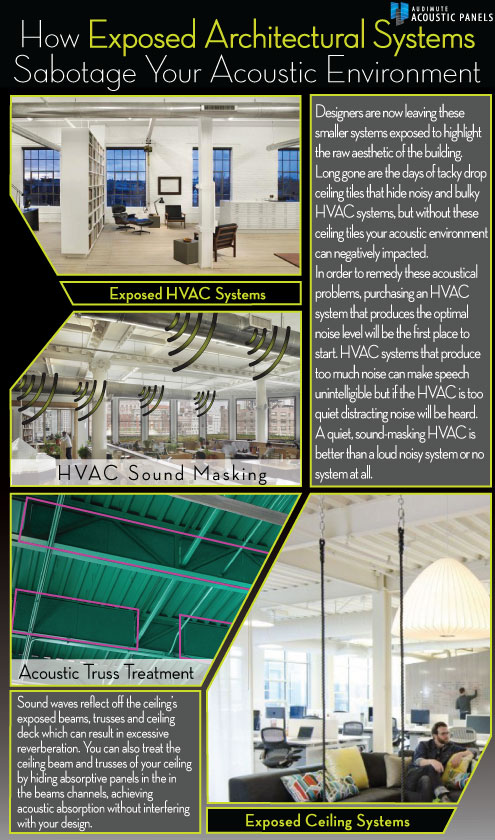
Today, HVAC systems have been redesigned to be smaller, quieter and more efficient than ever. So designers are now leaving these smaller systems exposed to highlight the raw aesthetic of the building. Long gone are the days of tacky drop ceiling tiles that hide noisy and bulky HVAC systems, but without these ceiling tiles your acoustic environment can be negatively impacted.

Select the HVAC System with the Right Amount of Noise

In order to remedy these acoustical problems, purchasing an HVAC system that produces the optimal noise level will be the first place to start. HVAC systems that produce too much noise can make speech unintelligible but if the HVAC is too quiet distracting noise will be heard. A quiet, sound-masking HVAC is better than a loud noisy system or no system at all.

Other Exposed Systems that Create Acoustical Problems

Other exposed ceiling elements can cause additional acoustical problems. Sound waves reflect off the ceiling’s exposed beams, trusses and ceiling deck which can result in excessive reverberation. This reverberation can make conversation and concentration difficult. For the acoustical problems caused by exposed ceilings, sound absorption products can be utilized. Sound clouds are an effective acoustical treatment and can serve as the focal point for your space. You can also treat the ceiling beam and trusses of your ceiling by hiding absorptive panels in the in the beams channels, achieving acoustic absorption without interfering with your design.

Rewards for Acoustical Comfort

Selecting a quiet system and adding sound absorption products will help create an ideal work environment for your employees. Today, creating an acoustic environment that fosters productivity is more important than ever. As we mentioned last week, in our Green Building post, designers and contractor are now being rewarded, through LEED certification, for taking acoustic comfort into consideration when redesigning an office environment. If you need assistance with HVAC noise, please feel free to give us a call, 866-505-MUTE, and one of our specialists will be more than happy to assist you.

Exposed-Architectural-Systems-and-Acoustics-Infographic

architectural systems pinterest

Drum Booth Setup: Talking Acoustics

drum booth setup banner

Audimute’s “Talking Acoustics” video series offers you easy solutions for the noise in your life. Presented by our acoustic specialist, Rick, these videos aim to explain the complexities of sound in an easy to understand way.

In the first video, Drum Booth Setup, Rick discusses 4 inexpensive solutions for controlling drum room noise. Rick, a drummer himself, offers tips from personal experience, years of teaching drum lessons and his vast knowledge of acoustic science.

1. Decouple kit from floor

The first drum room setup tip is to decouple your drum kit from your floor. When your drum kit sits on the floor the sound waves shoot directly through the floor to the people below you. Creating a platform for your drums to sit on will reduce the amount and the intensity of sound that travels to the floor below.


To decouple your drum kit from the floor, take a piece of ply wood, wrap it in carpet padding and carpeting and set your kit up on top of that. This solution won’t reduce noise transfer however; it does make the situation much more livable for you and your neighbors.


For added sound reduction our Peacemaker®, noise barrier product, installed between two pieces of plywood and then wrapped in carpeting will reduce even more noise transfer to the people below you.

2. Set up kit to face room not wall

The second tip is to set your drum kit up so that the bass drum audience side is not facing any given wall. When your kit is too close to the wall the sound waves compress and then intensify in volume. It is best to set your kit up towards one side of the room and then face the audience side outward. This gives the sound time to travel and weaken before hitting the wall again.

3. Seal off air passage ways

The third drum booth setup tip is to seal off air passageways like doors, windows and vents. Air passage ways are vehicles for noise transfer because anywhere air can go sound can go so sealing passage ways is important.

-Start by sealing off the gaps around your doors with Door Seal Kit or weather stripping.

-If you have a vent in your practice space that projects your sound into other rooms, try creating a trap door for your vent with a piece of plywood. When you are done practicing simply remove the trap door.

-Finally create a window plug for any windows in your space. A window plug can be made by taking a piece of plywood and then adding a layer of our Peacemaker®, sound barrier product, to it and then placing it in your window.

4. Practice with Brushes

The last drum room setup tip is to practice with brushes. Brushes will do more then just bring the sound down in your practice space. Brushes allow you to develop more wrist strength because they do not have the natural rebound that sticks do forcing you to maintain better control of your hands.

For more helpful Drum Booth setup tips watch the video below or check out our Drum Room Soundproofing Guide. Tune in for the next Talking Acoustics video, 5 tips to control Dog Barking Noise.

5 Tips to Control Dog Barking Noise: Talking Acoustics

Dog Barking Noise Banner

Audimute’s latest “Talking Acoustics” video describes 5 easy solutions for controlling Dog Barking Noise. Most pet owners know how hard it is to leave their animals at home alone for both long and short periods of time. Often times when left alone, our pets tend to be loud and disruptive to the people living around us.
Dog barking specifically is one of the loudest and most common pet noise problems that can be disruptive to our neighbors. In the video below Rick, Audimute’s acoustic specialist gives a few simple solutions to make both your dog and your neighbors happy.

  1. Play Soft Classical Music

    Dogs find classical music soothing and playing it can reduce the frequency of your dog’s disruptive barking. Most dog owners under estimate how intelligent their K-9 companions actually are and they are unaware of how much dogs appreciate the complexities of classical music. Keeping classical music on a low volume while you are away may be all you need to cut down on your dog’s troublesome barking.

  2. Add a Window Plug

    If you leave your dog in a room with a window adding a simple window plug to the space may be beneficial.  A glass window is usually the weakest structural element in a room and often the source for the most noise transfer.  Layering plywood with a barrier product like our Peacemaker® will help add mass to your window and reduce the amount of sound that transmits out of your space.

  3. Seal off Air Gaps

    The air gaps around a door can also transmit sound out of a room. Any place air can go, sound can go so sealing off your doorway with weather stripping or our Door Seal Kit can greatly reduce the noise that transfers out of your space.

  4. Add Soft Absorption Materials

    Adding soft materials to your space can also greatly cut down on the intensity of your dog’s barking sound. Absorption products soften the hard reflective surfaces in your dog’s space and can reduce the amount of sound that travels outward to your neighbors.

    Begin by adding blankets, rugs and curtains to the space to cut down on some of the intensity of the Dog Barking Noise. If your dog’s barking is still disruptive, a consistent absorption solution, like our Absorption Sheets or Acoustic Panels, might be necessary.

  5. Increase Mass and Density to Your Wall

    If all of the above tips fail, adding mass and density to your walls will block noise transfer out of your space. Mass loaded sound barrier products, like our Peacemaker®, reduce the transference of sound waves into and out of a room. Adding mass to your walls will require some light construction but once installed the results will be consistently effective.

For more information about reducing the amount of Dog Barking Noise in your space give us a call, 866-505-MUTE, and one of our acoustic specialists will be able to help you or check our our resource center for Pet Noise Control. Stay tuned for our next “Talking Acoustics” video about noise control in open concept spaces.

Noise Control in Open Home Floor Plans: Talking Acoustics

Open Home Floor Plans Banner

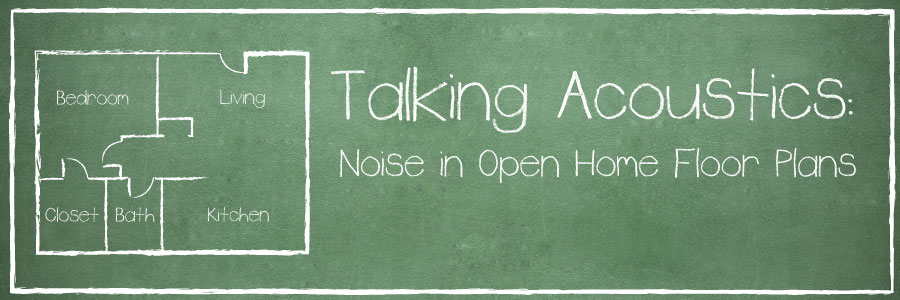
Open Home Floor Plans are the latest modern home design trend. This type of floor plan is ideal for hosting social gatherings; supervising your kids and allowing natural light permeate your home. However, the large reflective surfaces characteristic in an open concept home can create a variety of acoustical problems. These acoustical problems can reduce conversational clarity and intensify the sounds in your home.

In this week’s “Talking Acoustics” video, Rick (Audimute’s acoustic specialist) provides a few easy solutions to help make your open floor plan home a comfortable and inviting place to live.

Break Up Large Reflective Surfaces

The key to ideal acoustics in an open concept home is to break up the large reflective surfaces with soft, breathable materials. Breathable materials (like the ones listed below) absorb excess sound waves and can eliminate troublesome echo and reverberation.

Soft Materials for Successful Sound

• Tapestries
• Drapes and curtains
• Area rugs or carpeting
• Decorative partitions
• Absorption products (like our Acoustic Panels
• Fabric furniture versus leather (leather is a reflective material)

If excess noise and echo is a problem in your open concept home, feel free to give us a call and one of our acoustic specialists will be able to help you! For more information about Open Home Floor Plans, check out our Residential Spaces Resource Center